

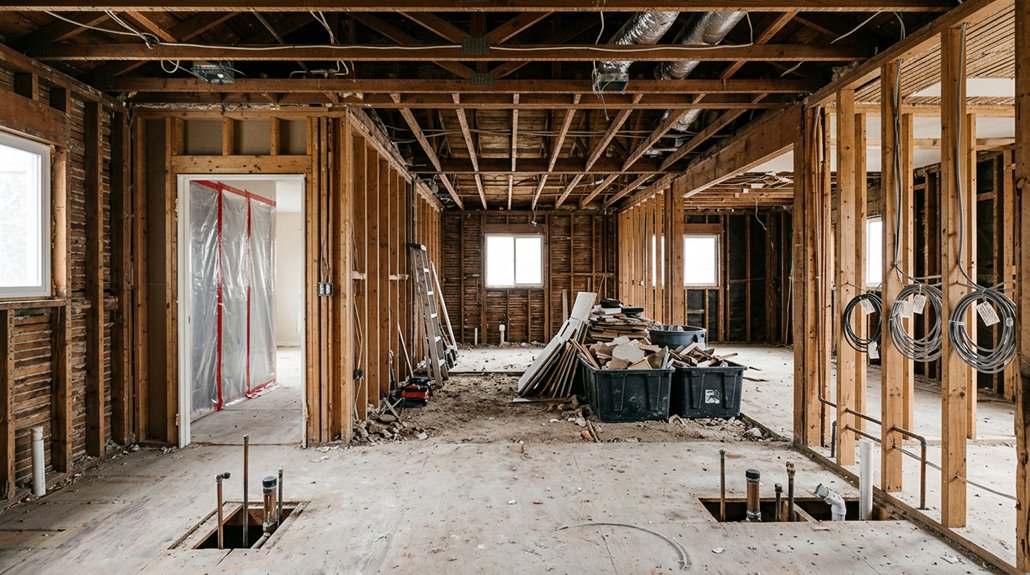
A complete interior strip-out removes non-structural finishes, fixtures, and redundant services, leaving the building shell ready for renovation. Before work starts, you’ll confirm the scope, retained elements, utility isolation, hazardous-material surveys, permits, access, and waste routes. Contractors protect adjacent areas with sealed barriers, floor coverings, and, where needed, HEPA-filtered negative air. Crews dismantle materials in sequence, separating reusable items, recyclables, and hazardous waste. Depending on size, access, and complexity, the work can take days or weeks; key checks follow.
Key Takeaways
- A complete interior strip-out removes selected non-structural finishes, fixtures, and redundant services while protecting the building shell and anything designated to remain.
- Before work begins, confirm the scope, retained elements, measured plans, access arrangements, permits, and utility disconnections.
- Arrange hazardous-material surveys and qualified removal of materials such as asbestos or lead before disturbing affected areas.
- Expect sealed work zones, dust controls, protective coverings, PPE, and planned debris routes to safeguard workers and adjacent spaces.
- The schedule can range from days to weeks, depending on the property, materials, access, sequencing, and unexpected conditions.
What Does a Complete Interior Strip-Out Include?
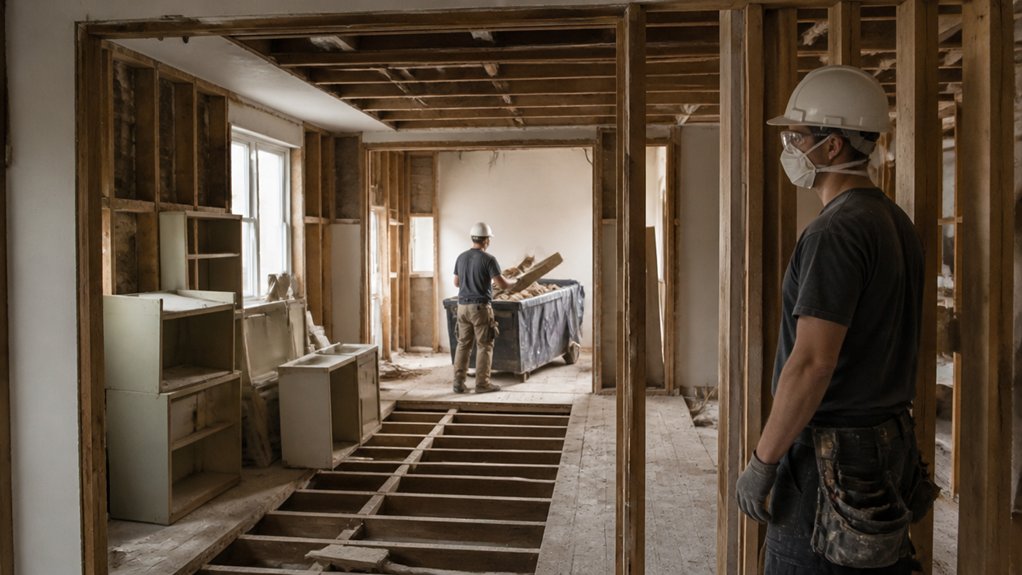
A complete interior strip-out removes selected non-structural finishes, fixtures, and services to expose the building’s shell for renovation. You’ll first define the work zone, document existing conditions, and confirm which systems must remain live.
Your contractor then isolates utilities, establishes dust controls, and sequences removal to protect retained areas. The scope may include Decorative finishes and building services, but it won’t alter Structural elements unless your approved design specifically requires it.
Crews sort materials for reuse, recycling, or disposal and track hazardous substances under applicable regulations. You’ll receive a cleared, accessible interior that supports accurate surveys, repairs, and new installations.
Before work starts, review drawings, access routes, safety procedures, and waste plans with your team. Clear scope boundaries help you prevent damage, delays, and unexpected costs.
Which Fixtures and Finishes Are Removed?
Once the strip-out scope is set, the fixtures and finishes removed depend on the renovation plans and what the building must retain. You may remove kitchen cabinets, worktops, sinks, toilets, taps, lighting, radiators, doors, and built-in storage.
Your contractor can also disconnect and remove redundant mechanical, electrical, and plumbing components, while protecting services scheduled to remain.
Finish stripping may include lifting floor coverings, removing tiles, taking down wall panels, and scraping back plaster or coatings. The team can expose structural surfaces for inspection or leave sound substrates intact for the next installation.
Specify whether you want fixtures salvaged, recycled, or disposed of; careful fixture removal can preserve items for reuse and reduce waste. Your drawings and scope should identify retained elements, removal limits, and any hazardous materials requiring specialist handling.
How Should You Prepare for a Strip-Out?
Before work begins, assess the existing space and identify materials, hazards, and items to retain.
Coordinate utility isolation and site access with your contractor.
Protect adjacent areas with suitable barriers and dust controls.
Assess the Existing Space
Start by documenting the space as it stands: photograph each room, note existing damage, and mark walls, floors, and fixtures scheduled for removal.
Create a measured plan showing dimensions, ceiling heights, openings, and fixed elements that will remain.
Record material types and visible defects, such as cracked plaster, damp patches, or uneven flooring; these details help your contractor distinguish pre-existing conditions from strip-out damage.
Check drawings against the actual layout, and flag discrepancies for investigation before work begins.
Identify salvageable items, including doors, hardware, and architectural features, so you can specify careful removal and storage.
Use this inventory to guide decor planning and refine budget estimation, including allowances for hidden defects and disposal.
A clear baseline gives you a reliable reference for scope decisions, progress checks, and later comparisons.
Arrange Utilities and Access
Coordinate utility isolation with your contractor and qualified providers before demolition begins: shut off and verify electricity, gas, water, and heating services in the work area, and label any lines that must remain live. Confirm that each isolation point matches current drawings, then test circuits and pipes to prevent unexpected energization or leaks.
Ask providers to disconnect or cap utility connections that won’t serve the project, and record their locations for reinstatement.
Plan site accessibility by setting approved entry routes, delivery times, and equipment clearances with your contractor. Check that workers can reach the work zone and remove debris without blocking required exits.
Arrange keys, permits, and access codes in advance, and identify who’ll control entry each day. Keep emergency contacts and isolation instructions available to the crew before work starts.
Protect Nearby Areas
To limit dust and accidental damage, seal off adjacent rooms with taped polyethylene sheeting and protect floors, door frames, and fixed finishes with suitable coverings. Extend barriers to ceilings where needed, and seal gaps around pipes, ducts, and temporary access points.
For effective Dust mitigation, use a negative-air machine with HEPA filtration when the work area connects to occupied spaces. Keep return-air vents covered only after confirming the HVAC system is shut down or isolated.
Move loose belongings out of the work zone before crews arrive. For essential items that must remain, apply Furniture protection with fitted covers, then secure them against movement and impact. Mark protected surfaces clearly so workers can avoid contact during debris removal.
Create a designated route for tools and waste, and cover that path with durable, slip-resistant boards. Inspect barriers daily and repair tears promptly.
How Do Contractors Protect the Site?
Before removing finishes or fixtures, contractors isolate the work zone to limit dust, debris, and damage to occupied areas. You’ll see sealed access points, floor protection, and temporary barriers that separate the site from active spaces. Contractors may use negative-air machines with HEPA filtration to capture airborne particles and maintain controlled airflow.
They’ll also protect elevators, corridors, and building systems with durable coverings and clearly marked routes.
Site security matters throughout the project. Controlled entry, visitor logs, and locked storage help keep unauthorized people away from hazards and equipment. Your contractor should post warning signs, maintain emergency access, and coordinate schedules with building management.
These controls support contractor safety, too: workers use appropriate protective equipment, follow site-specific procedures, and keep exits unobstructed. Ask how the team will inspect barriers and update protections as site conditions change.
What Happens During Strip-Out Work?
Once the work zone is secured, the crew removes interior elements in a planned sequence, typically starting with fixtures and finishes before moving to partitions or other approved components. You’ll see workers isolate services, verify utility shutoffs, and use controlled methods to detach cabinets, flooring, ceilings, and wall linings.
Before any partition comes down, your contractor checks drawings and completes a structural assessment to distinguish non-load-bearing elements from components that must remain. Interior demolition proceeds in defined sections, with monitoring for hidden wiring, plumbing, hazardous materials, or unexpected conditions.
If the crew finds a concealed service or suspect material, they’ll pause, secure the area, and confirm the next step with you. This measured sequence limits damage to retained building systems and keeps the renovation scope aligned with approved plans.
How Is Strip-Out Waste Sorted and Removed?
You’ll sort strip-out waste on-site into designated streams to improve traceability and recycling.
Your crew can recover reusable materials before they’re damaged or contaminated.
You’ll then remove remaining waste using safe handling procedures and approved disposal routes.
On-Site Waste Sorting
On-site sorting separates strip-out waste by material before removal, keeping timber, metal, plasterboard, and reusable fixtures in designated containers. You’ll see crews position labeled skips near work zones, then move each material through controlled routes to reduce handling and prevent cross-contamination.
Your Waste management plan should identify container locations, collection schedules, and access limits before dismantling starts. Clear labels and simple color coding help workers follow Recycling procedures consistently, even as waste volumes change.
Supervisors check loads for mixed materials and redirect items to the correct stream. Keep hazardous substances, such as fluorescent lamps or contaminated insulation, separate in compliant, sealed containers; trained handlers arrange their removal under applicable rules.
Scheduled collections prevent overflow, protect site access, and create a traceable record of quantities sent to recycling or disposal facilities.
Reusable Material Recovery
Before crews discard anything, they assess fixtures, doors, cabinetry, and fittings for reuse. You can ask your contractor to document each item’s condition, dimensions, and removal requirements. This inventory identifies salvage opportunities and helps match components with your project’s design, resale channels, or donation partners.
Crews then dismantle selected items methodically, protecting edges, finishes, and hardware. They label and group components by type, material, and condition so you can trace their destination and avoid mixing reusable material with demolition debris.
Where suitable, teams may recover timber, metal sections, architectural details, and intact flooring for refurbishment or repurposing.
Your contractor can coordinate collection with buyers, reuse organizations, or on-site storage plans before strip-out work begins. Confirm ownership, acceptance criteria, and pickup timing in advance; these decisions keep recovered items useful and prevent delays to the renovation schedule.
Each item’s route should be recorded in the project’s recovery log.
Safe Waste Removal
Once reusable items have been logged, crews sort the remaining strip-out waste by material and hazard class at the point of removal. You’ll see timber, metals, plasterboard, glass, and concrete placed in separate, labeled containers to preserve clean recycling streams.
Workers isolate hazardous materials, such as asbestos, lead-containing finishes, and chemical residues, and package them under applicable regulations. Before work begins, your contractor should confirm required surveys, containment measures, and licensed disposal routes.
Sealed, covered skips prevent dust, leaks, and unauthorized access; crews move them along planned routes that avoid occupied areas. Digital waste records can track weights, destinations, and recovery rates, giving you an auditable chain of custody.
How Long Does a Complete Strip-Out Take?
A complete interior strip-out can take anywhere from a few days to several weeks, depending on the space’s size, the materials involved, access constraints, and the scope of removal.
A single room with straightforward finishes may be cleared quickly; a multi-level property with fixed joinery, complex services, or dense partitions requires more time.
Your schedule also depends on how crews sequence tasks. They may isolate work zones, remove finishes in stages, and coordinate specialist trades to protect retained elements.
Unexpected layers behind walls or floors can extend the programme, so allow contingency rather than setting an overly tight deadline.
Design aesthetics and material selection influence removal complexity: layered finishes, bonded surfaces, and custom installations take longer to dismantle than standard components.
Your contractor can provide a phased estimate after evaluating the project’s scale and access. Clear scope definitions help you track progress and understand schedule changes.
What Should You Check Before Renovation?
To prevent delays and protect the building, confirm the strip-out scope, site access, utility isolation, hazardous-material survey, and any permits or approvals before renovation begins.
Verify that drawings identify retained elements, structural limits, waste routes, and protection requirements. Ask your surveyor to flag asbestos, lead, or other regulated materials so you can arrange compliant testing and removal before work starts.
Review budget considerations beyond demolition rates: include utility disconnections, waste handling, temporary protection, specialist remediation, and contingency for concealed conditions.
Check that your programme allows inspections and approval hold points before follow-on trades enter.
For contractor selection, compare licences, insurance, relevant project experience, method statements, and waste-transfer documentation.
Confirm who controls access, records services, and signs off completed areas. A clear responsibility matrix helps you resolve issues quickly and release each zone safely for renovation.
Conclusion
A complete interior strip-out is the first stage of rebuilding: think of it as clearing a site before laying a new foundation. You’ll remove selected fixtures and finishes, protect retained areas, and sort waste for safe disposal. Before work begins, confirm the scope, access, utilities, schedule, and contractor responsibilities. During removal, monitor progress and resolve surprises promptly. Once the space is clean, inspect surfaces and services against the renovation plans. Then your project can move forward on a sound, verified base.
Leave a Reply