

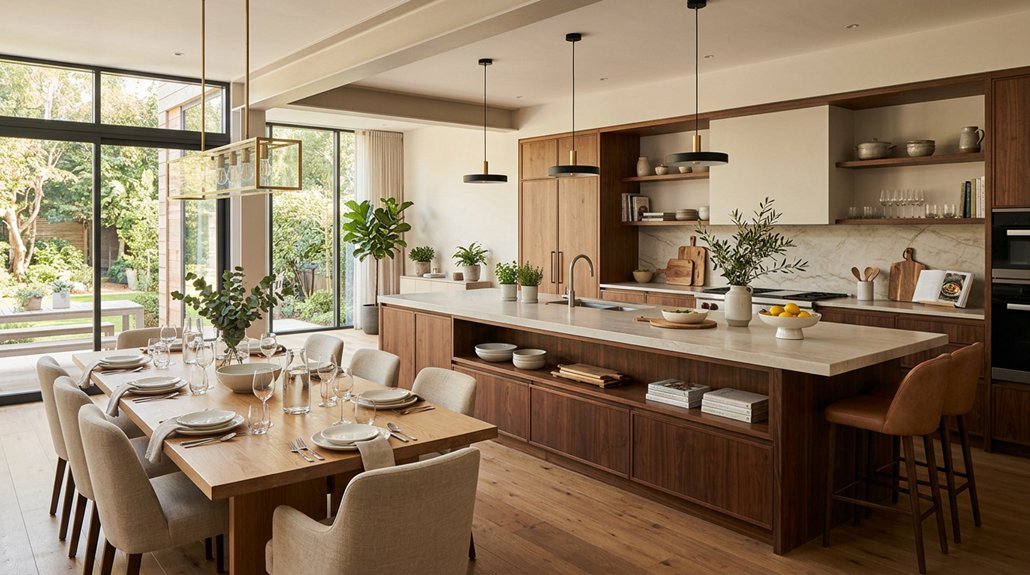
To improve kitchen and dining flow, map how you and your guests move between the fridge, counters, serving areas, and seats. Keep main paths clear, allow about 36 inches around the table, and open sightlines by lowering visual barriers. Give your island dual purpose: prep space for mixing flavors and seating for conversation. Check plumbing and electrical before moving fixtures, then add nearby storage and a serving station. Like a well-balanced cocktail, thoughtful details make entertaining feel effortless; the next steps can refine your layout.
Key Takeaways
- Map routes between the kitchen, dining table, serving areas, and exits to identify bottlenecks before changing the layout.
- Keep main pathways clear, allowing about 36 inches around the dining table and extra room where traffic or chairs move.
- Position serving stations and storage near prep areas and dining spaces, but outside high-traffic routes.
- Improve sightlines by reducing visual barriers, keeping surfaces uncluttered, and using consistent finishes and lighting.
- Design the island for both prep and gathering, with accessible storage, guest-facing seating, durable surfaces, and suitable lighting.
Map Kitchen and Dining Room Traffic
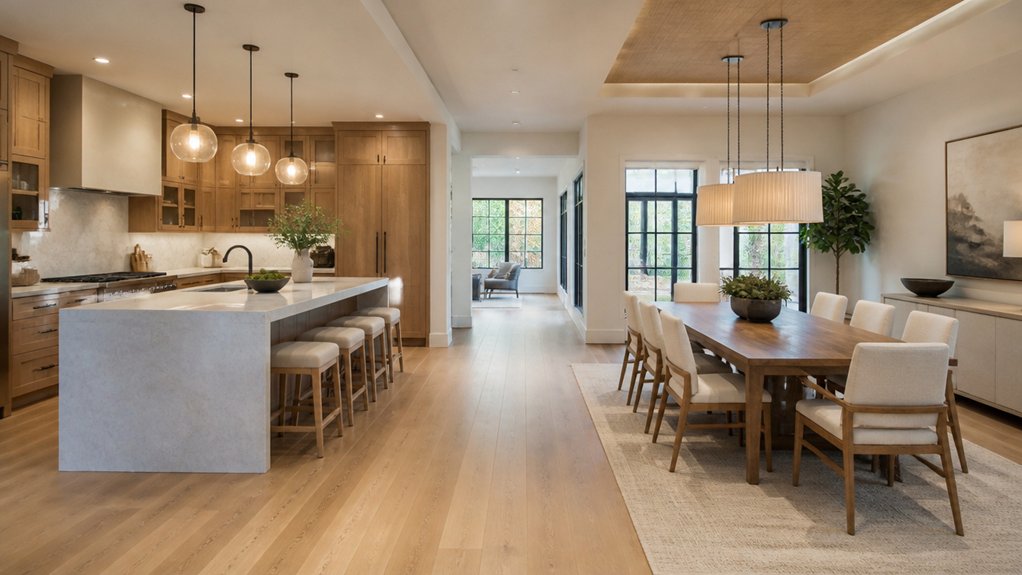
Before moving walls or shifting appliances, map how people travel between the kitchen and dining room. Track your usual routes from the refrigerator to the counter, then from the serving area to each seat.
Notice where guests gather, where servers turn, and which paths collide. Think like a bartender building a smooth service station: keep frequently used ingredients and tools within easy reach, and give every pour a clear route to the table.
Use Color coordination to distinguish work zones from dining space without creating visual clutter. A consistent palette can make the transition feel as balanced as a cocktail’s complementary flavors.
Add lighting design that supports each task: bright, focused light for prep and softer illumination for meals.
Test your plan during a real gathering; watch traffic, adjust furniture, and refine the flow before committing.
Check Plumbing and Electrical Before You Move Things
Once your traffic plan works, check the plumbing and electrical before relocating a sink, dishwasher, range, or outlets. A professional plumbing inspection can reveal whether your new sink location needs longer supply lines, a relocated drain, or better venting. Don’t assume a tempting spot will work just because it suits your prep routine; hidden pipes can make that move costly.
Have an electrician assess electrical wiring, circuit capacity, and outlet placement before you shift appliances or add a beverage station. Your espresso machine, blender, and wine fridge may each demand reliable power, while a range often needs a dedicated circuit.
Think of these checks as balancing a cocktail: each component must work together. Confirm requirements early, then plan your kitchen and dining setup around safe, practical connections—not last-minute fixes that sour the whole experience.
Open Sightlines Between the Kitchen and Dining Room
Remove visual barriers to let your kitchen and dining room flow like a well-balanced cocktail. Carry consistent sightlines across both spaces, much as you’d pair bright citrus with complementary flavors.
You’ll create a setting where cooking and dining feel naturally connected.
Remove Visual Barriers
A clear sightline between the kitchen and dining room lets the whole space flow like a well-balanced cocktail, with each area distinct yet connected. To preserve that connection, remove visual obstructions that interrupt the view, such as tall shelving, bulky furniture, or heavy partitions. Decorative barriers can still add character, but choose open designs that let you see through them, much like a delicate garnish adds interest without overpowering a drink.
Keep counters and dining surfaces uncluttered, so your eye can travel smoothly from food preparation to the table. If you’re renovating, consider a pass-through or a lower divider instead of a solid wall. These choices help you stay part of the conversation while you cook, serving every guest a more inviting blend of comfort, connection, and effortless entertaining.
Use Consistent Sightlines
After clearing visual barriers, align the kitchen and dining room around a consistent sightline. Let your view travel from the island to the dining table, then toward a focal point, such as a pendant or artwork. This visual sequence works like a well-built cocktail: each element complements the next without competing for attention.
Repeat finishes, metals, or wood tones across both rooms to create color coordination, much like matching a drink’s garnish to its flavor profile. Keep counters and table surfaces uncluttered so your eye can move freely.
Layer lighting ambiance with task lights in the kitchen and a softer glow above the table; together, they guide guests from prep to conversation. When you choose furnishings and accents, consider how they’ll look from both spaces, preserving an inviting, balanced view.
Rework the Island for Prep and Gathering
When you rework the island, give it a clear role in both meal prep and gathering. Shape Island functionality around your cooking style: add a generous chopping surface, a pullout for oils and bitters, and storage for tools you reach for often.
Keep a sink or cooktop only if it supports your routine without crowding the workspace. Then create Gathering zones with seating on the side that lets guests watch you muddle citrus, shake a cocktail, or plate small bites.
A raised ledge can separate drinks from prep while giving friends a perch. Choose durable, easy-clean finishes that handle splashes from berry syrups and fresh herbs.
Add task lighting for precise knife work and softer pendants to set an inviting mood. You’ll prep confidently, serve creatively, and pair each bite with a drink.
Set Clear Paths Around Counters and Seating
Clear paths around counters and seating keep kitchen traffic flowing while you prep, pour, and serve. Study your Traffic patterns before settling on seating arrangements: trace the route from refrigerator to sink, cooktop, and serving counter, then keep those lanes open. You’ll move more smoothly between tasks, whether you’re muddling herbs for a spritz or plating citrus-marinated bites.
Place stools where they won’t interrupt access to drawers, appliances, or the drinks station. If guests can reach a glass without crossing your chopping zone, you can keep mixing and chatting at once.
Align chairs with the table rather than the main work route, and leave a direct path to dining seats. A thoughtful layout lets you pair a crisp cocktail with dinner, then serve each course without detours or bottlenecks.
Give Guests Space Without Crowding the Cook
Give guests a comfortable place to gather without pulling the cook away from the stove. Create a perch at the island’s outer edge or a small drink station beyond the prep zone. Spatial separation lets you shake a citrus-forward spritz, garnish a smoky mezcal cocktail, or pour sparkling water without competing for counter space.
Keep glassware, ice, and mixers together so guests can serve themselves while you focus on timing and flavor. For guest comfort, offer a clear view of the cooking action, but keep conversation outside the chef’s working reach.
A slim ledge or movable cart can hold tasting pours and small bites, such as olives with a briny martini or spiced nuts beside a ginger highball. You’ll stay in control of the stove, and guests will feel included, not underfoot.
Choose a Dining Layout That Fits the Room
Choose a table shape that suits your room, like you’d balance a cocktail’s ingredients.
Keep walking paths clear so guests can move easily between the table and kitchen.
With the right layout, you’ll serve comfort alongside every course.
Match Table Shape to Room
Like a well-balanced cocktail, a dining layout works best when its elements suit the space. Choose your Table shape by reading the Room proportions, much as a bartender balances spirit, citrus, and sweetness.
A round table softens a square room and encourages easy conversation, like a bright aperitif that brings guests together. In a long, narrow room, a rectangular table echoes the architecture and gives the setting a composed, elongated finish.
If your room feels compact or has an unusual outline, try a square or oval table; each can add character without overwhelming the visual recipe.
Consider how many people you usually host, too. A shape that fits your everyday dining needs can still feel celebratory when you pair it with expressive lighting, layered textures, and a lively centerpiece.
Let the room set the measure.
Preserve Clear Walking Paths
A dining layout should leave room to move, just as a well-built cocktail needs space for each flavor to come through. Keep paths between the kitchen, table, and exits open so guests can carry plates without dodging chairs.
Aim for about 36 inches of clearance around the table; add more where people pass often or pull out seats.
Think of flow optimization as balancing a drink: each element needs room, but nothing should overpower the mix. Place serving carts and sideboards outside main routes, and check that open cabinet doors won’t block traffic.
For smart traffic management, map how guests will move from the kitchen to their seats, then adjust the layout before hosting. You’ll make conversation, serving, and refills feel effortless, like a crisp pairing that brings every course into harmony.
Add Kitchen-Dining Storage and Serving Space
When you rework the kitchen-dining layout, add storage and serving space that keeps meal prep flowing and makes entertaining feel effortless. Give your pantry organization a clear system: group cocktail bitters, syrups, glassware, and dry goods where you can reach them quickly.
A shallow cabinet or built-in shelf near the dining area can hold linens, plates, and bar tools without crowding counters. Create a serving station with room for a mixing pitcher, ice bucket, and garnishes, then keep a nearby outlet handy for a blender or coffee maker.
Position it between kitchen prep zones and the table, so you can replenish snacks and pour drinks without crossing the room repeatedly. Store pairing essentials together—such as citrus for a crisp gin spritz and dark chocolate for a rich coffee cocktail—so hosting feels intuitive.
You’ll serve smoothly and keep flavors fresh.
Conclusion
Treat your kitchen and dining room like a well-balanced cocktail: every element should have room to shine, and each path should flow smoothly. When a family moved the island just 18 inches, guests could gather without blocking the cook—a small shift with a big payoff. You don’t need a full renovation to improve the mix. Clear the routes, open sightlines, and give serving space a place of its own. Then your home can host dinner with the ease of a perfectly poured drink.
Leave a Reply